
HOW TO ADD PRESETS TO LIGHTROOM: LIGHTROOM CC AND CC CLASSIC, IN 2022

Here is an easy guide on how to install Lightroom Presets on desktop computers. (Mac or Windows).
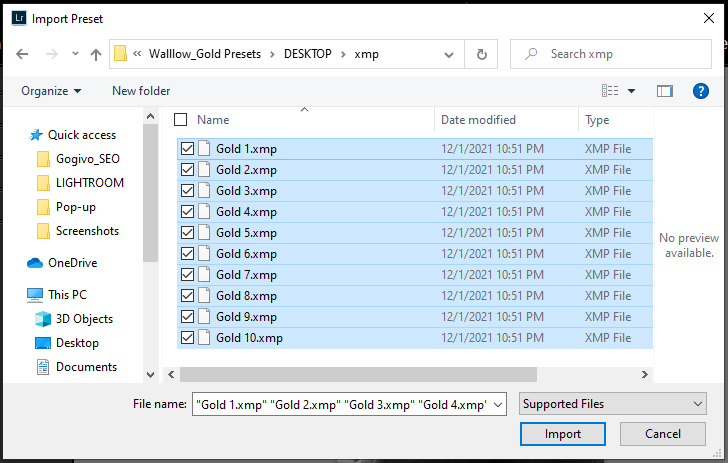
LIGHTROOM CLASSIC CC (2018 AND NEWER)
STEP 1
Open Lightroom, go to Develop Module (Shortcut D) and click the plus (+) sign on the right side of the Presets panel. Click on “Import Presets”.

STEP 2
Select your presets individually (.xmp files) or install all as a zip file and then click Import.
LIGHTROOM CC
STEP 1
Open Lightroom, navigate to the Develop Module and go to File -> Import Profiles and Presets.

STEP 2
Select the presets. You can select all the presets (.xmp files) or import a zip file to add directly to Lightroom CC. Now all Presets are ready to be used.
HOW TO INSTALL LIGHTROOM 4, 5, 6 & CC 2017 PRESETS FOR WINDOWS
- Open Lightroom
- Go to: Edit > Preferences
- Click on the Presets tab in the new opened window.
- Click on the button named: Show Lightroom Presets Folder
- Double click on Lightroom
- Double click on Develop Presets
- Copy the folder(s) of your presets (.lrtemplate files) in the Develop Presets folder.
- Restart Lightroom
HOW TO INSTALL LIGHTROOM 4, 5, 6 & CC 2017 PRESETS FOR MAC
- Open Lightroom
- Go to: Lightroom (Dialogue)> Preferences
- Click on the Presets tab in the new opened window.
- Click on the button named: Show Lightroom Presets Folder
- Double click on Lightroom
- Double click on Develop Presets
- Copy the folder(s) of your presets (.lrtemplate files) in the Develop Presets folder.
- Restart Lightroom
Related Posts

Top Free Lightroom Presets
If you’re a photographer, blogger, or designer looking to spice up your photos with some snazzy effects and filters, then you need to download these free Lightroom presets now! Our collections are designed by professional photographers and offer Free Lightroom Presets for photography in RAW and JPG formats. This Lightroom presets are compatible with Lightroom 4-6, Lightroom CC, Lightroom Classic, Lightroom Mobile and Photoshop. The best part? They’re all completely free!
Free moody Lightroom presets
DOWNLOAD NOW
The...